Glass Kiln Schedules
Determining a Glass Kiln Schedule for firing is greatly varied and gives different results.
There are zillions of kiln schedules. really…
A Glass Kiln Firing Schedule is a series of progressive steps that takes the kiln’s heat from its starting room temperature to the hottest temp wanted and then back down to room temp. This often take upwards of 22 hours to complete.
Think of it like a series of steps on a ladder. Once each step is accomplished, then the kiln moves to the next step, and then the next step, until we reach the top. Once the kiln hits the top step (hottest), we slowly move back down steps until we get back to the cool room temp.
Kiln Schedules are programmed into the kiln’s controller.
Each step is different and meant to accomplish a different result. There are heating steps and cooling steps and each step of the Kiln Schedule is made up of three basic components:
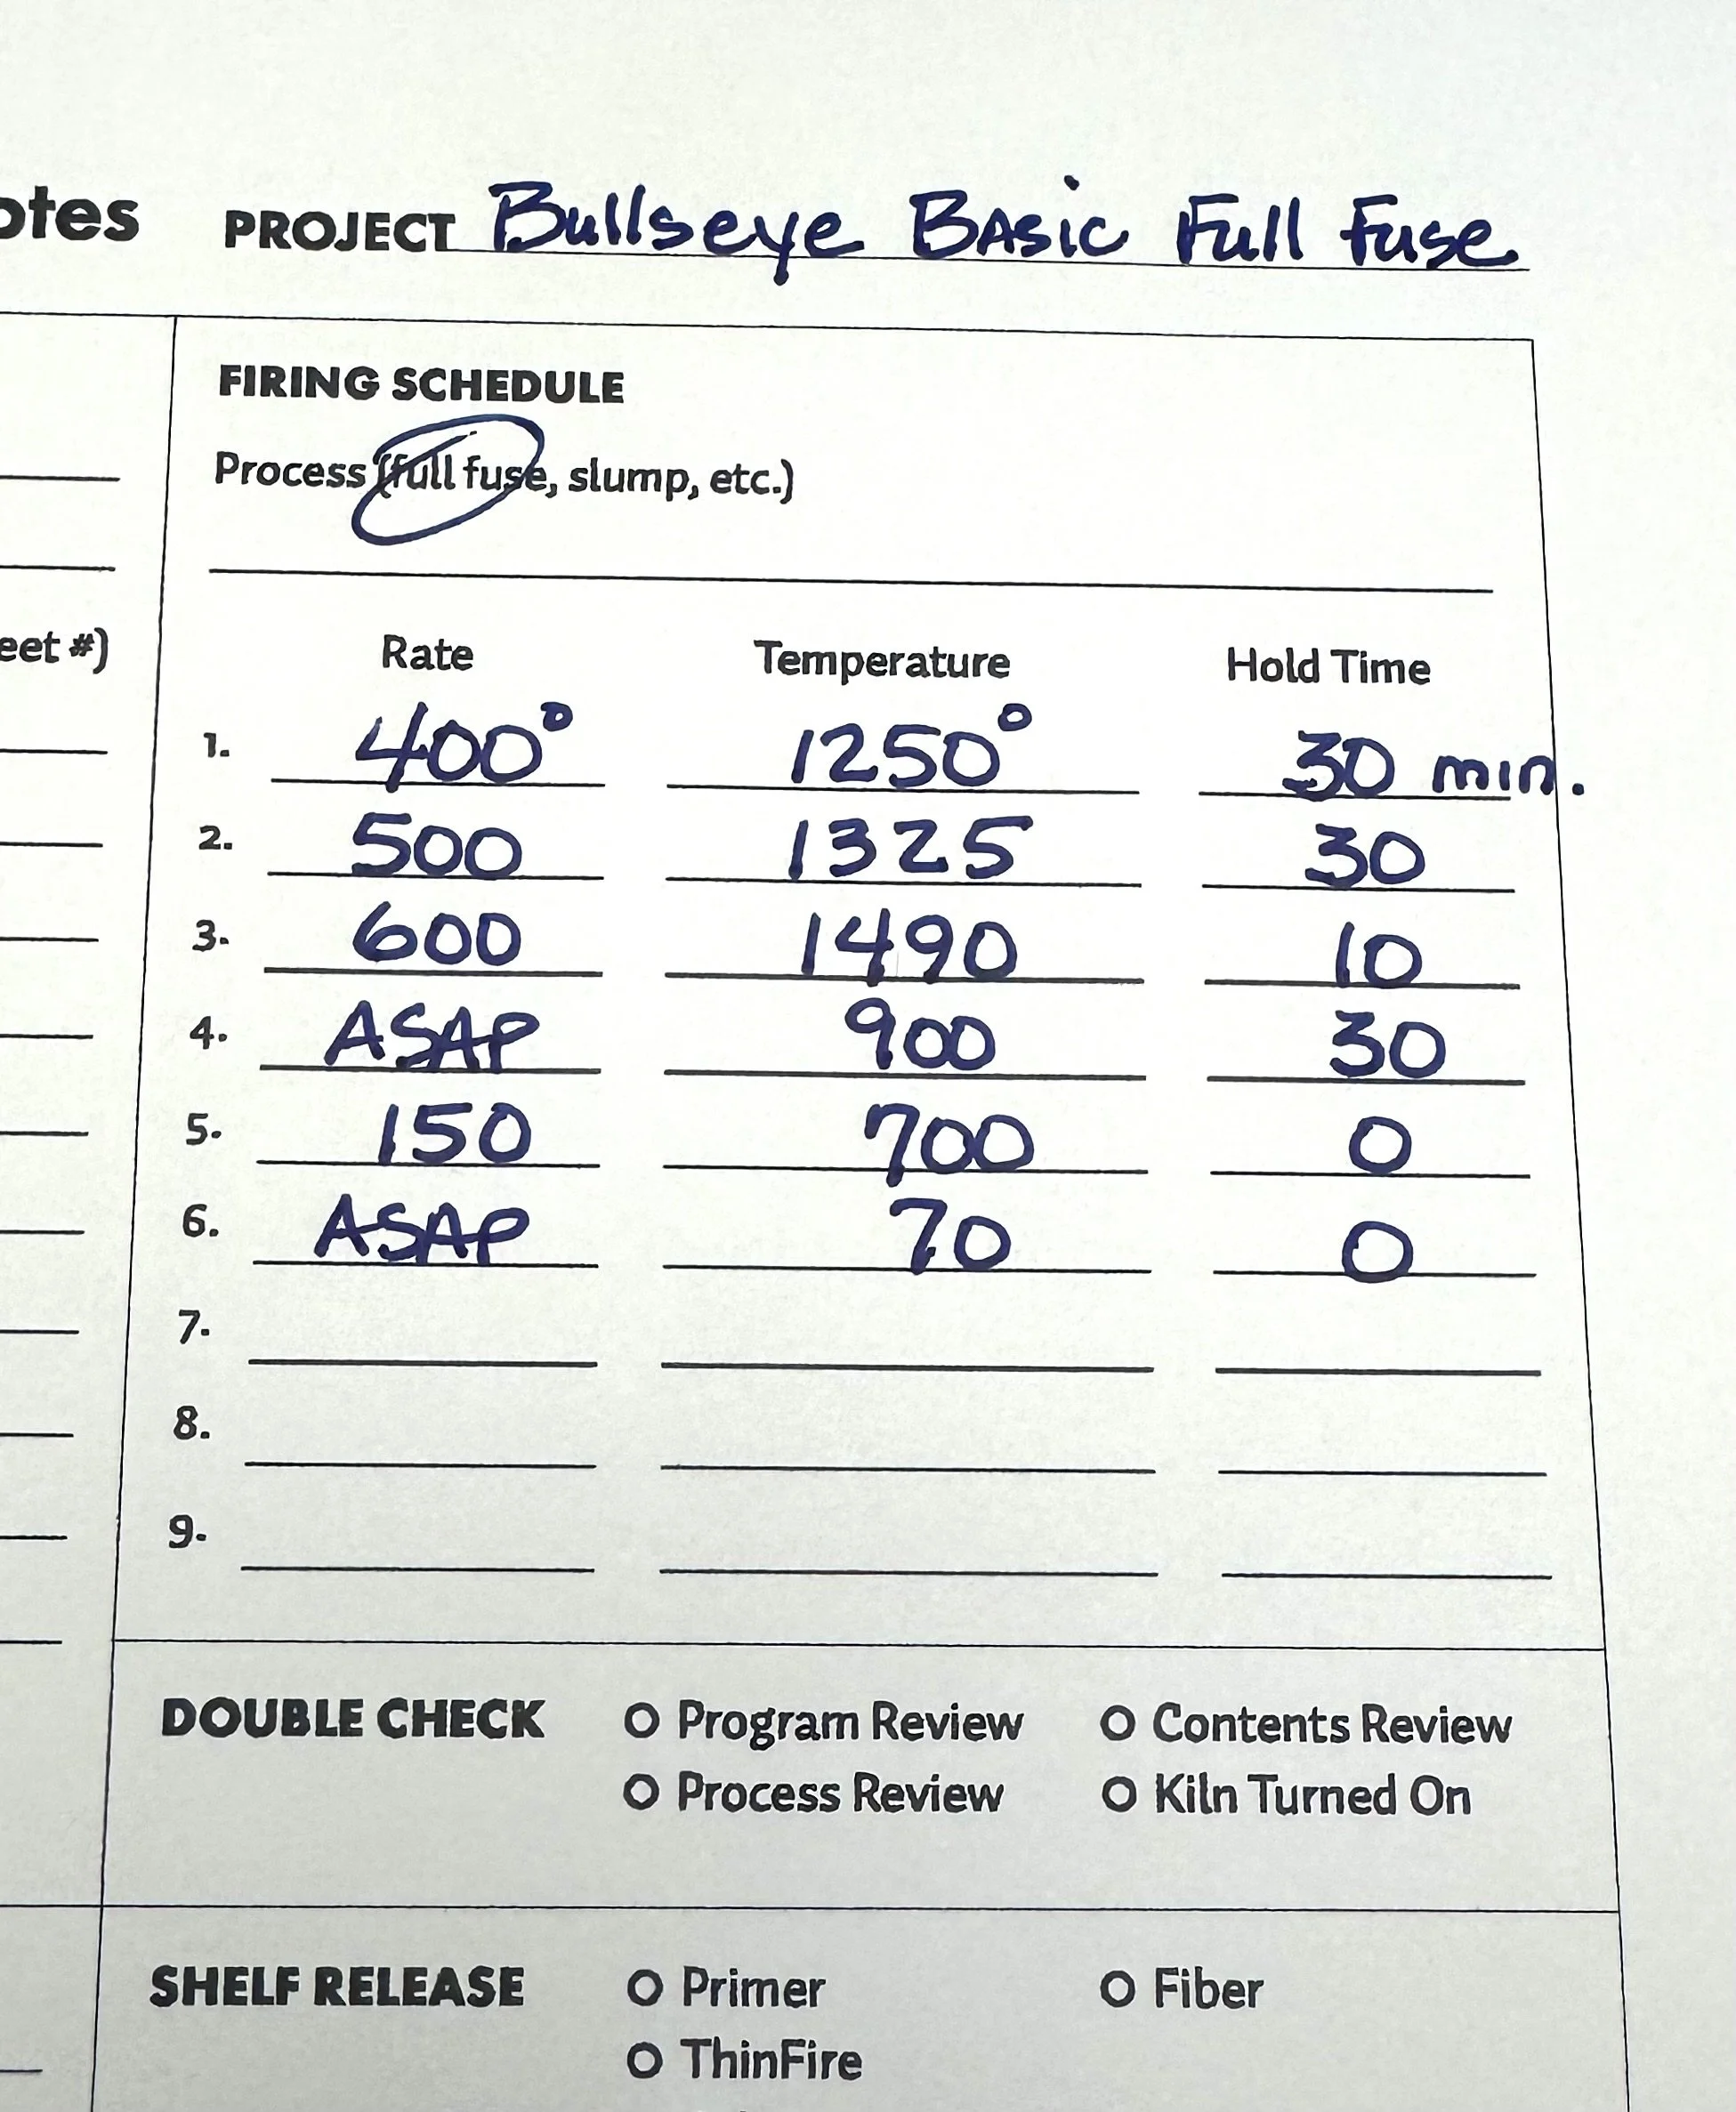
Temp Ramp Rate: Let’s say - 400 degrees per hour.
Set Point: This is the desired temp for Step #1. 1250 degrees.
Hold Time: Measured in minutes and is a Hold or “soak” time. Such as 30 min.
The above example looks like this:
Step 1: 400 1250 30
Step 2:
Step 3:
One of the steps, maybe “Step 2” is called a “Bubble Squeeze”. This Step is meant to hold the glass (30 min) at a temperature of (1325) allowing bubbles in the glass to escape. Some artists want bubbles such as my Sea Foam 6.5” Glass Bowl and is controlled in various ways.
Once the peak temperature and hold time is achieved, then the “Annealing” (cooling) begins which is slow and takes several Steps (i,e, 4,5,6) and hours to allow the glass to return to room temp. If Annealing is done too fast, the glass will crack or shatter.